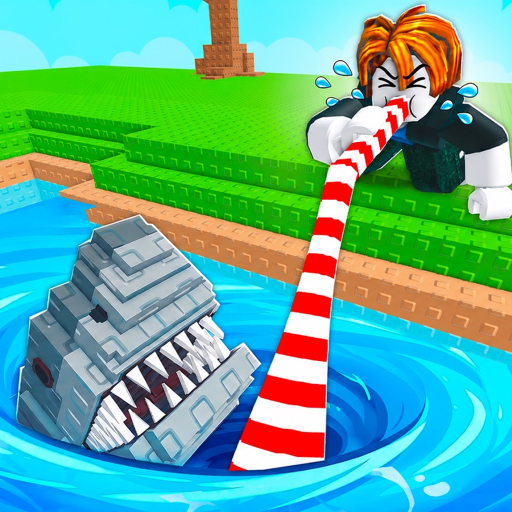
Lake Sipping Roblox Beginner Guide: First Progression Route
Follow this lake sipping roblox beginner guide from straw controls and fish catches through selling, equipment upgrades, lake chests, NPC quests, and new areas.
Lake Sipping starts with a simple rhythm—sip water, catch fish, sell the catch, and improve your equipment—but the useful beginner route is about doing those actions in the right order. Equip the available straw and bucket, work from above the water, hold the sip control to charge, and release it to draw water. When a fish enters the catch interaction, switch immediately to repeated taps. After the inventory fills or your next purchase is affordable, sell the fish and reinvest in the next clear bottleneck.
This route follows the verified early loop without assuming a fixed economy. Prices, menu positions, and balance values can change, so read the live shop and quest panels before spending. The strategy remains stable: maintain enough capacity to finish productive sessions, add straw power when draining feels slow, and use quests and lake chests as progression checkpoints instead of wandering without a target.
Start with the sip-and-catch controls
Stand above the lake rather than entering the water blindly. Equip the straw, hold the current sip input until the charge is ready, then release. A fish encounter interrupts the water-draining rhythm, and the archived walkthroughs show players tapping rapidly to secure the catch. Rarer fish were reported as requiring faster tapping, so treat every prompt as an immediate reaction check instead of waiting for a long animation.
The walkthrough below demonstrates the overall sequence. Use it as a visual example, not as an official patch note; if a button label or interaction differs, the live Roblox client is the authority.
Your first goal is consistency. One successful charge that produces a catch is more useful than moving between lakes without completing interactions. Watch the catch prompt, keep the cursor or touch position ready, and stop sipping only when you need to sell, turn in a quest, or make the next equipment decision.
| Action | Verified result | Next decision |
|---|---|---|
| Charge and release the straw | Removes lake water and can trigger a fish catch | Stay until the route produces reliable catches |
| Tap during the fish interaction | Secures the fish when the input succeeds | Sell now or continue until capacity is tight |
| Sell an equipped fish or use Sell All | Converts catches into progression currency | Choose a straw, bucket, or quest target |
| Drain a lake | Makes the lake-bottom chest reachable | Open the chest after participating in the sip |
| Complete NPC objectives | Supports equipment, item, bridge, or area progression | Return to the relevant NPC before changing routes |
Sell fish before capacity becomes dead time
The evidence supports two selling patterns: selling an equipped or individual fish, and using Sell All for the inventory. A new player should normally use the option that returns them to sipping with the least delay. Individual selling is useful when you deliberately want to keep a catch; Sell All is useful when the inventory is simply fuel for the next upgrade. Check the current interface before assuming every special fish should be sold.
Capacity is a route constraint, not just a number. If the bucket fills halfway through an active lake, the extra travel and menu time can make an otherwise strong straw feel inefficient. If draining is slow but capacity remains comfortable, straw strength may be the bottleneck. If catches arrive quickly and the inventory fills first, a bucket upgrade can create a longer uninterrupted session. The live cost determines when the purchase is affordable; this guide only supplies the decision rule.
The verified early equipment sequence includes the Starter Straw, Bamboo Straw, and Steel Bucket. That is evidence of an early path, not a promise that every player must buy in exactly that order. Quests, rewards, and current balance can change the most sensible purchase. Compare what is limiting the current session, then choose the item that removes that limit.
Turn every drained lake into a checkpoint
Continuing to sip eventually drains the lake and exposes its bottom. The chest becomes reachable after that drain. Archived demonstrations also indicate that participating in the sipping may matter for receiving the reward, so do not assume arriving after other players finish the work will always be equivalent. Contribute to the drain, follow the lake downward when it is safe, and interact with the chest using the current prompt.
Walkthroughs reported common, gold, royal, diamond, and mythical chest tiers. Those labels are useful for recognizing that chest outcomes can vary, but this guide does not assign rates or guaranteed contents. Treat the visible chest and reward panel as final. The actionable lesson is to finish a lake when the remaining drain is reasonable, because leaving just before the chest converts earlier sipping into no immediate checkpoint.
Use the chest moment to reset the route:
- Check inventory space and sell if the next lake would overflow it.
- Turn in any NPC objective completed during the drain.
- Compare the next straw or bucket requirement with the resources on hand.
- Review whether an accessible bait or boost supports the next goal.
- Move toward a new area only when its live requirement is met.
Use NPC quests to make movement productive
NPC objectives connect the core loop to longer progression. Archived evidence names Mr. Foster, Dr. Zapp, and Ben in examples involving fish objectives, equipment progression, bridge or area access, and item rewards. Talk to visible NPCs before beginning a long session, then reread the objective rather than guessing the requested fish, count, or location.
Ben's bridge quest is especially important as a route concept: an apparent map barrier may be an objective gate rather than an equipment problem. When a path looks blocked, check nearby NPC dialogue and the quest tracker before spending on unrelated upgrades. Mr. Foster and Dr. Zapp likewise demonstrate that early objectives can direct which fish or actions matter next.
Avoid collecting several unrelated tasks and then forgetting the turn-in points. A practical loop is lake, sell, quest check, upgrade, next lake. This keeps travel tied to a concrete action and makes it easier to notice when an area, bridge, or shop has become available.
Move into new areas without abandoning the core loop
New areas add stronger straws and buckets, NPC quests, crafting or dispensers, and higher-level fish objectives. They expand the same underlying process rather than replacing it. Before crossing an unlock, make sure you can still catch and store fish reliably; reaching a harder area without suitable capacity or power can slow progression.
Do not rely on a memorized level or price from an old video. Read the current gate, complete its listed quest or level condition, and keep a small budget reserve for equipment discovered on the other side. The separate new areas guide records the level and quest gates supported by the evidence packet and explicitly labels the area list as partial.
A steady Lake Sipping upgrade path therefore looks like this:
- master charge, release, and rapid tapping before optimizing anything else;
- sell often enough that bucket capacity never stops the session;
- improve the equipment that is currently limiting progress;
- contribute to a lake drain and collect the reachable chest;
- accept and turn in nearby NPC objectives;
- satisfy the live area gate, then repeat the same loop with the new shops and tasks.
Common beginner mistakes and fixes
Missing fish after a good sip: prepare to tap as soon as the catch interaction begins. The water charge and fish-catching inputs are separate parts of the sequence.
Running out of capacity too soon: sell before the next long lake, then compare the current bucket with the cost of the next available capacity upgrade.
Buying power without a route goal: choose one bottleneck—drain speed, capacity, quest item, or area gate—and measure the purchase against it.
Leaving before the lake chest: if the lake is close to empty and you have participated, finishing may produce a better checkpoint than switching immediately.
Treating community videos as permanent rules: use demonstrations to understand the loop, but verify costs, requirements, rewards, and button labels in the live experience.
Check the official Lake Sipping Roblox experience whenever a current prompt, price, quest, or reward controls the next decision.
FAQ
How to sell fish in Roblox?
Selling is game-specific. In Lake Sipping, archived walkthroughs show options to sell an equipped or individual fish and to use Sell All for the inventory. Follow the live sell interface, confirm what will be removed, and keep any catch you do not intend to convert into currency.
How to sell fish on Roblox game?
There is no universal Roblox fish-selling control. For this experience, return to the current selling point or menu shown in the game, select the relevant fish or Sell All option, and confirm the result before planning an upgrade.
How to sell the fish you catch?
Once the catch is stored, use the available individual-sale or Sell All flow. Sell when capacity is becoming a bottleneck or when the next useful straw, bucket, quest, or area requirement is affordable.
What should a new player upgrade first?
Upgrade the current bottleneck. Choose straw power when draining is the main delay, bucket capacity when inventory limits the session, or a quest requirement when it opens an important route. Current prices and item stats must be checked in the live game.